Binary City Time - Knowledgebase
Setting up Google Authenticator
16 Views •Enrollment - F17 (Fingerprints)
10 Views •Employee future start / end date
9 Views •How to change the time format
9 Views •Pastel Payroll - Batch configuration
8 Views •CSV export updates
7 Views •Fingerprint enrollment on IN01-A
7 Views •VIP Payroll export set-up
7 Views •Setting of employment date
7 Views •Setting up your plans and billing
7 Views •Adding a device in BC Time
7 Views •How to create departments in BC Time
7 Views •Setting up Overtime Rules
6 Views •How to make a User inactive
6 Views •RFID Card enrollment
6 Views •Make Time Comm depend on MySQL
6 Views •User interface updates
5 Views •How to add employee(s) to a group
5 Views •Setting up Scheduled Reporting
5 Views •Understanding Comm. commands
5 Views •Employment date
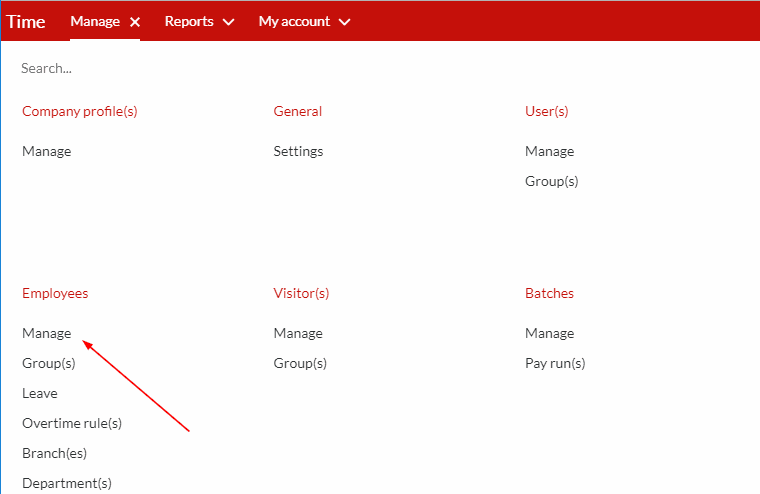
Step 1. Once logged into the system, go to Manage and click on Manage under Employees.
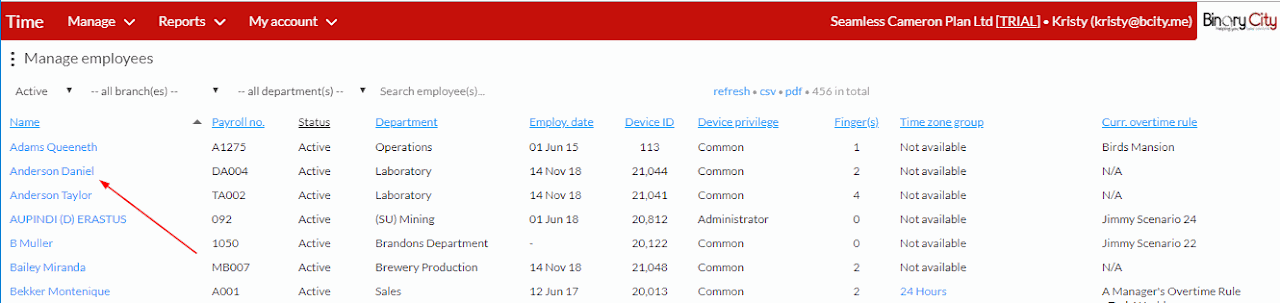
Step 2. Click on the employee name whose employment date you would like to set up, as indicated in the screenshot below.
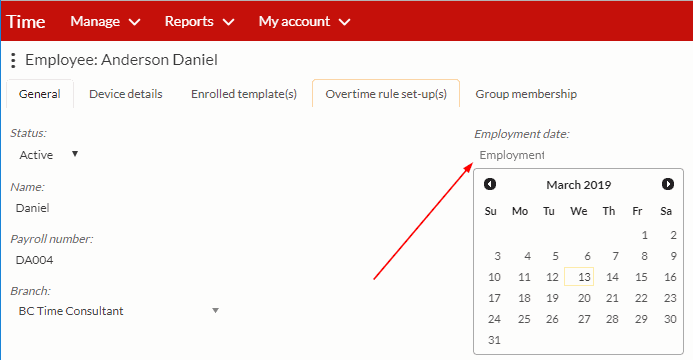
Step 3. As indicated in the screenshot below, insert the correct date under the employment date field.
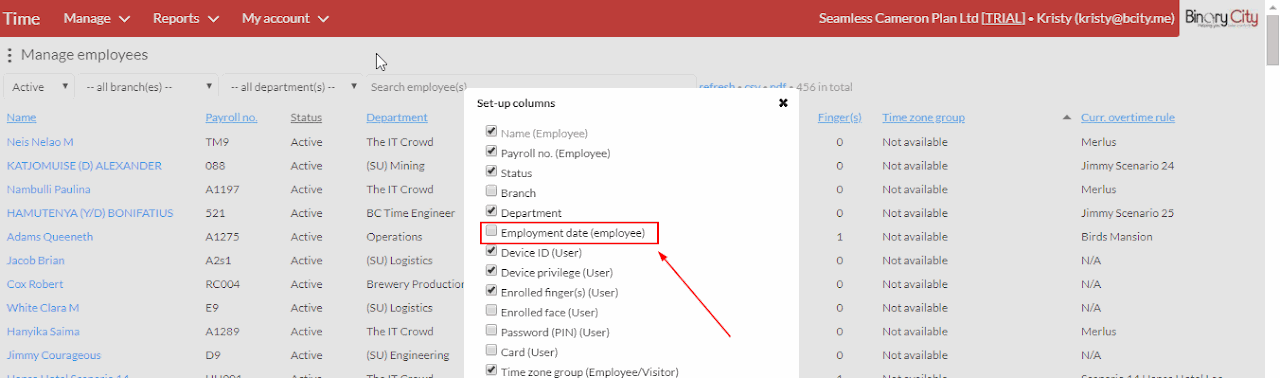
Step 4. If you wish to see the list of employees with the employment date included, rest your mouse cursor over any of the headings above the list of employees, the 'change' button will appear on the right as part of the headings, click on change to get the list of columns (see screenshot below)
Step 5. From the list of available columns, simply tick the 'Employment date (employee)' column and save.
Once saved, you'll see the new column added to your list of employees.
Views | |
---|---|
7 | Total Views |
0 | Members Views |
7 | Public Views |
Actions | |
---|---|
0 | Likes |
0 | Dislikes |
0 | Comments |
Share by mail
Please login to share this webpage by email.