Setting up a device for access control/security
Setting up a device for access control/security
Pre-requisite:
You must have Manage roles to Devices, Employee(s) and Employee Group(s) under the users Tab
Set up Area(s)
Set up Employee Group(s)
Step 1: Set up Areas and assign data sets to specific employee group
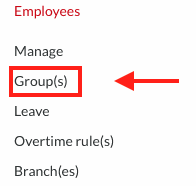
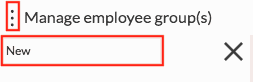
Create the Employee group: Navigate to Manage | Employees | Group(s) - create a group
Click New to create a new group
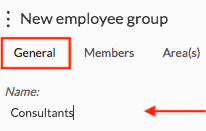
Create the Group: Navigate to the General tab - Name: provide a name for your group of employees
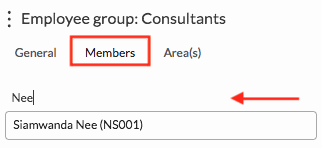
Create the Group: Navigate to the Members tab - Search and select the employee(s) that will belong to his group
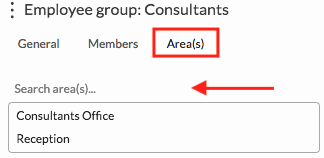
Create the Group: Navigate to the Area(s) tab - Search and select the area(s) that will belong to his group
Note: If no areas populate, proceed to the next step
Create the Areas: Navigate to Manage | Device(s) | Area(s) - create a new area

Click New to create a new area

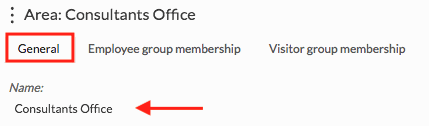
Navigate to the General tab: - Name: name the area
Navigate to the Employee group membership tab: - Select the employee group that should have access to this area
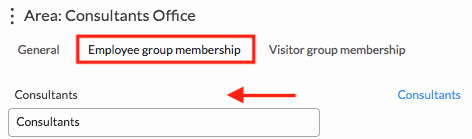
Note: If no data populates, ensure the pre-requisites above have been met and you have completed Step 1 above
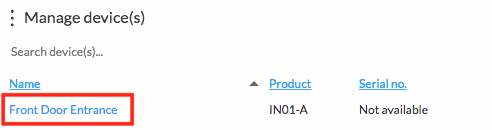
Step 2: Select the device you would like to set up as a security device
Note: Areas created in Step 1
Step 3: Navigate to Clock status & Area(s)
Come from area: This determines the area an employee comes from
Go to area: This determines the area an employee goes to
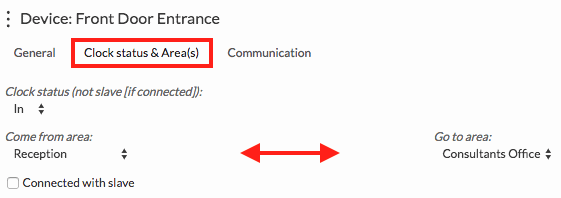
Note: Set up seen here is for a stand alone device used for Security purposes
All states will be determined by the status selected
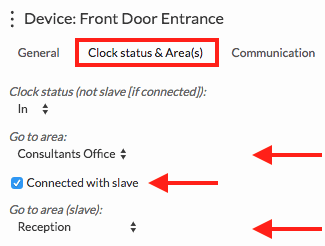
Note: Set up seen here is for a device connected with a slave device used for Security or Time and attendance and Security purposes
States of the master device will be determined by the status selected
Firmware must be updated accordingly to allow communication with the slave device
There are no comments for now.
to be the first to leave a comment.