Understanding Overtime approval 'Period' reports
Employee(s) Overtime approval - Period Rule
This function allows for the pre and pending approval of overtime hours worked and is only available on profiles where the billing option is set to Premium.
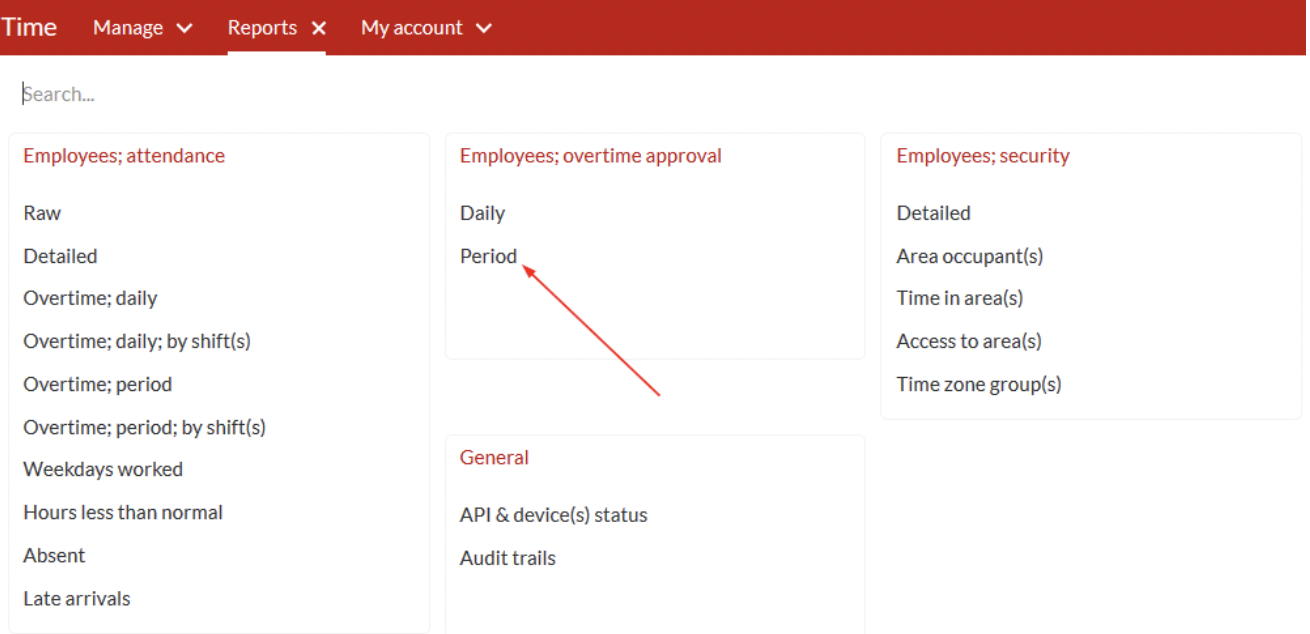
1. Once Reports are selected, click 'Period' under the Employees; overtime approval tab.
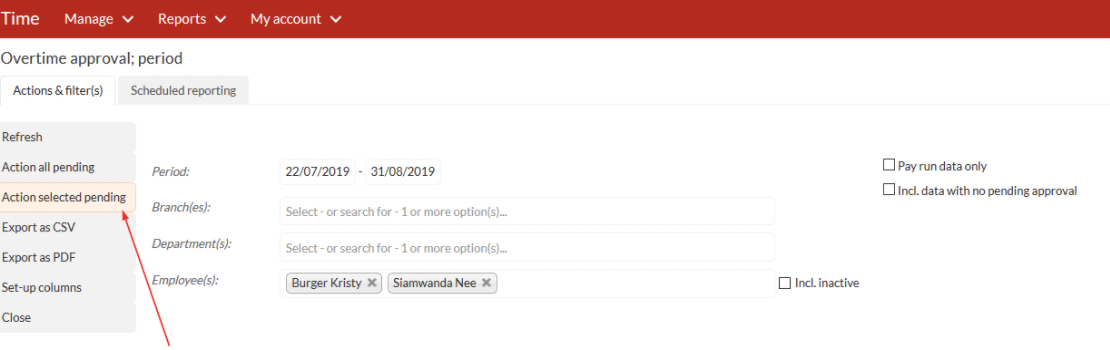
2. Filter your report by determining the following:
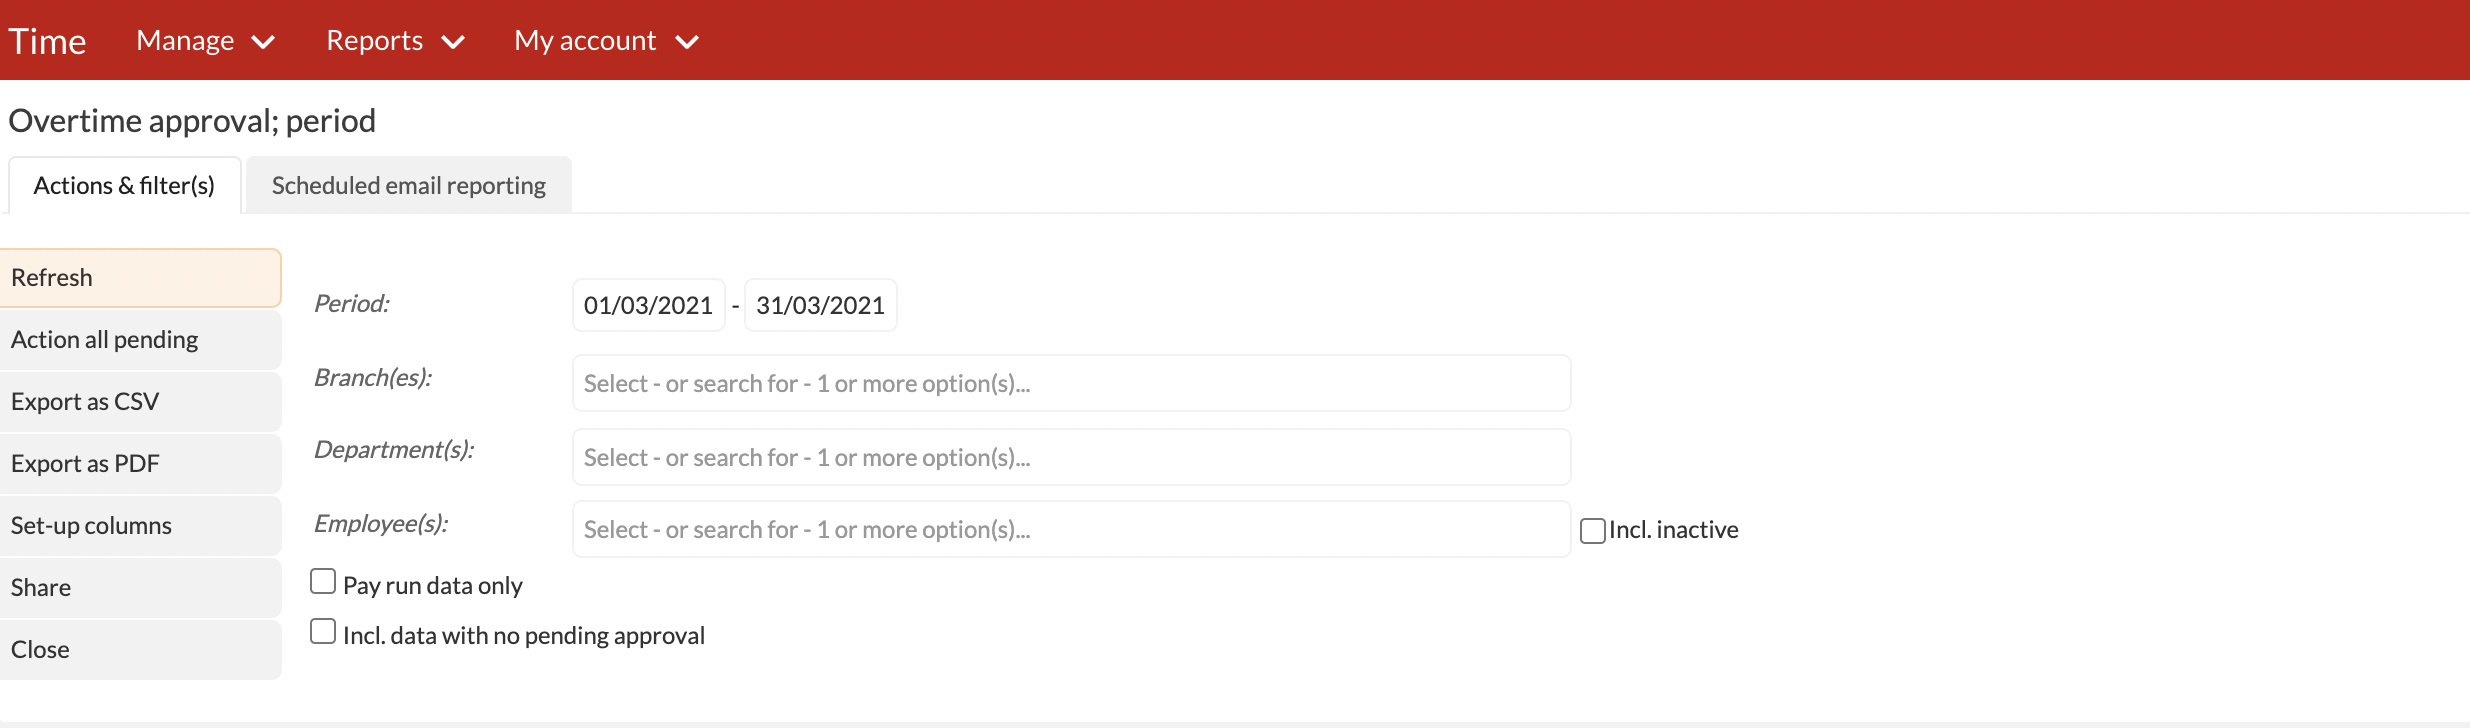
Period: The date you want your report to run from - start and end date
Branch(es): The branch(es) that you would like to view in this report (if required).
Department(s): The department(s) whose data you would like to view in this report.
Employee(s): The employees whose data you would like to view in this report.
NB: You have the option to leave the filters empty if you desire to see all data unfiltered.
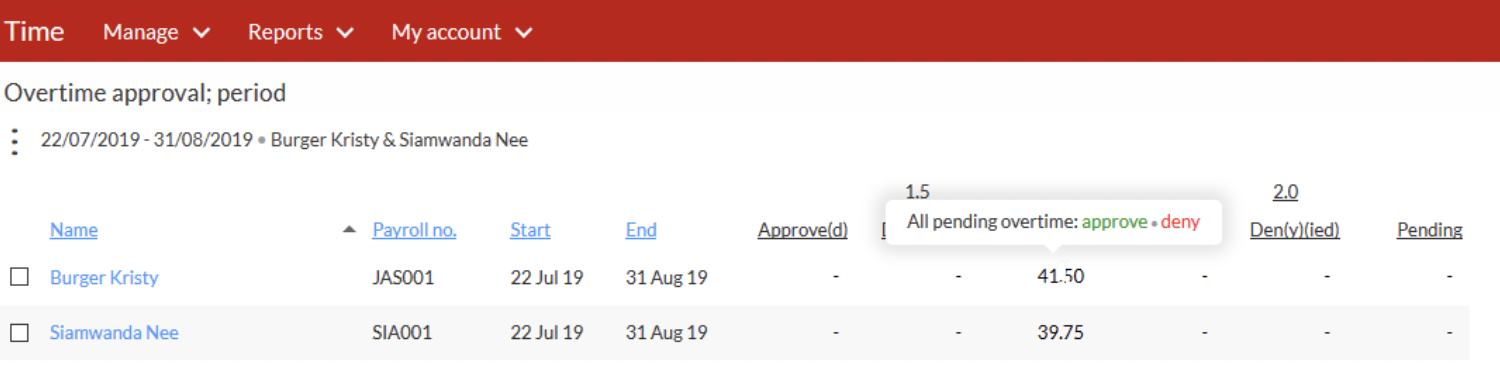
3. When retrieving an overtime approval report, there are three potential statuses that overtime can be found in under a specified overtime rate - Overtime is either Approve(d), Den(y)(ied), or Pending Approval.
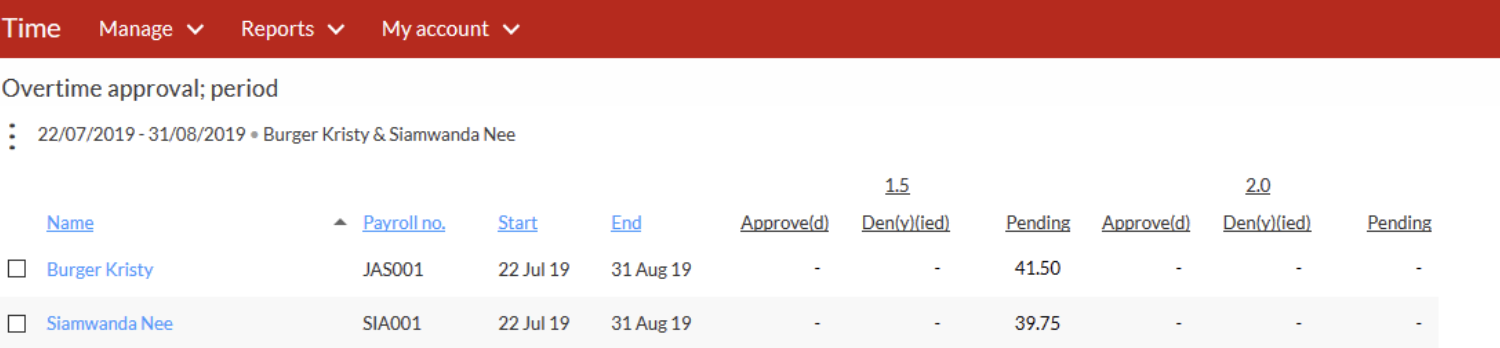
Approve(d): These are pre-approved and manually approved overtime hours as determined by the overtime rule setup.
Den(y)(ied): These are the hours that the overtime approver has chosen to deny. For example, if the employee has 4 hours overtime of which only 3 have been approved the 1-hour unapproved will fall under this column.
Pending: These are the overtime hours still pending approval.
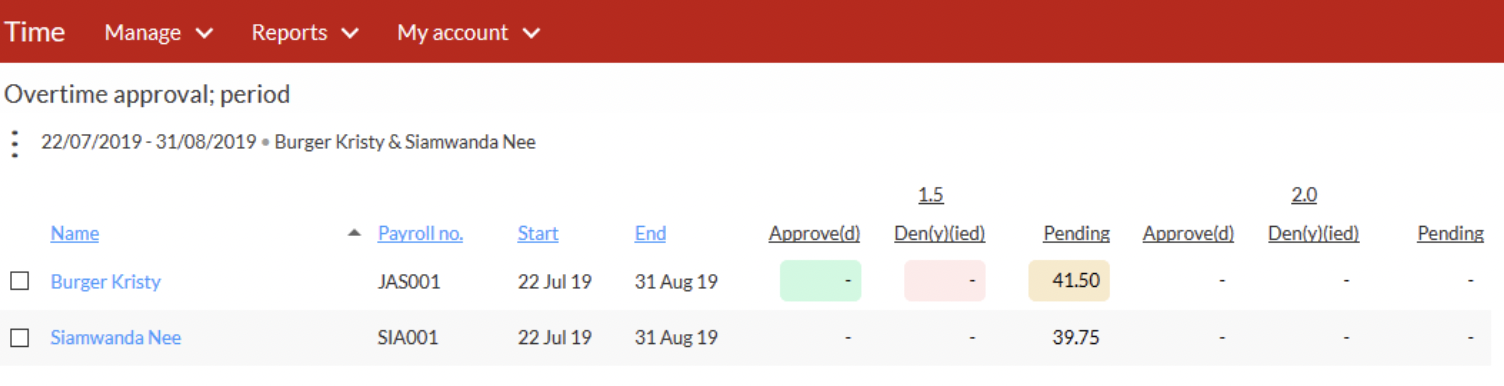
4. When approving overtime the user is able to stipulate the hours you seek to approve and the hours you seek to deny. There should be no hours under the pending status column as the system will not allow you to mark the process complete and you will not be able to export hours for pay-run whilst you have hours pending approval. The columns will have colors to indicate pending action.
5. Resting your cursor on any of the hours pending approval, a tooltip appears, reading 'All pending overtime: approve/deny' which allows you to quickly approve or deny selected hours without the need to manually select the hours for approval.
6. If you wish to approve multiple employees (s) and or day(s), you can use the checkboxes, you have the option to leave out some of the employee(s) and or day(s) that you do not want to approve or deny with the rest, once you have checked all the entries you wish to approve or deny, click on the vertical ellipses on the top left corner and click on the tab that reads 'Action selected pending' as shown on the screenshots below.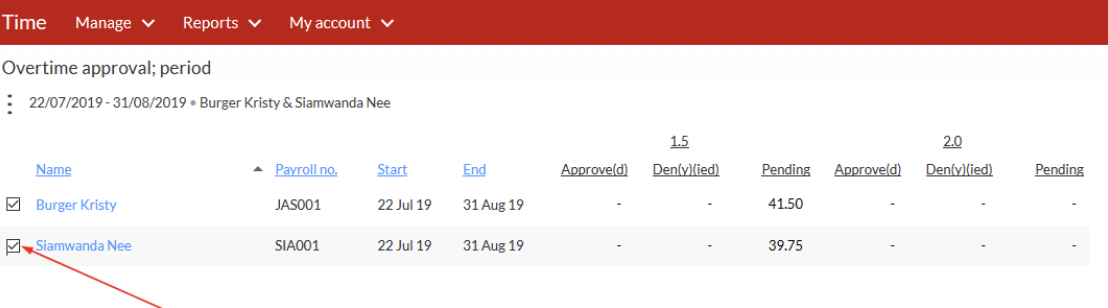
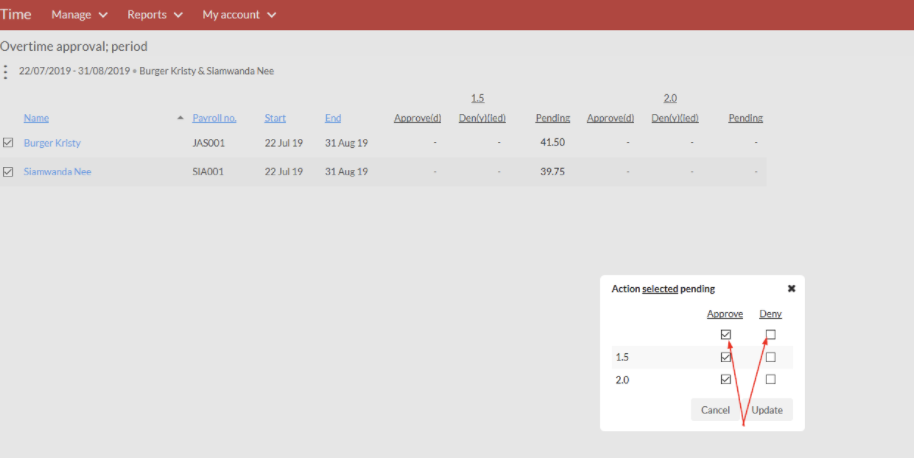
7. A dialogue box will appear providing the user the option to select approve or deny and specify the overtime rate you wish to action.
There are no comments for now.
to be the first to leave a comment.