How to create a new employee in BC Time
Creating a new employee in BC Time
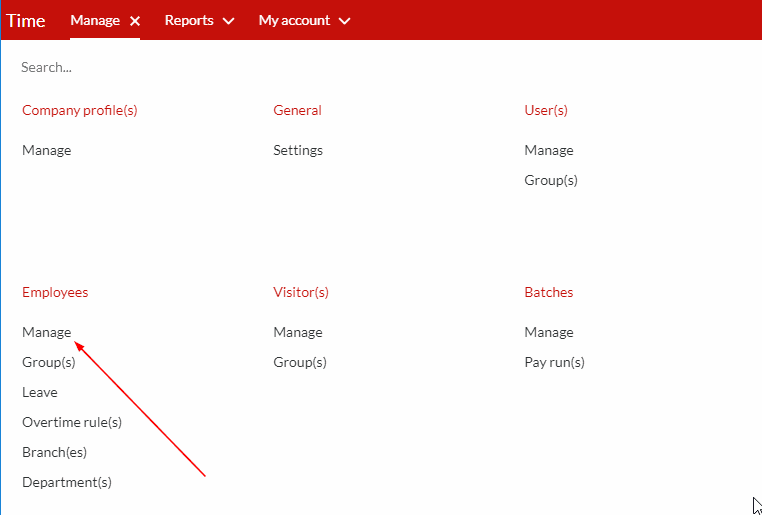
Step 1. Once logged into BC Time, go to Manage and Manage under Employees.
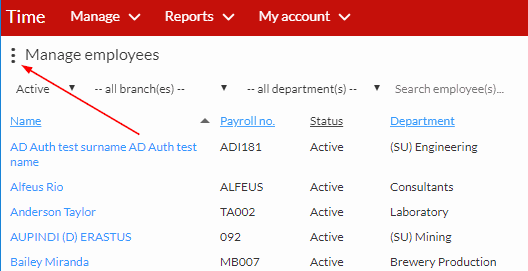
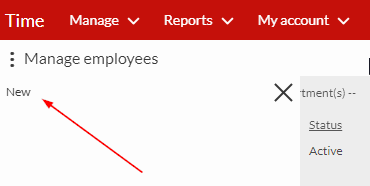
Step 2. Click on the three vertical ellipses and then click on New as indicated in the two screenshots below.
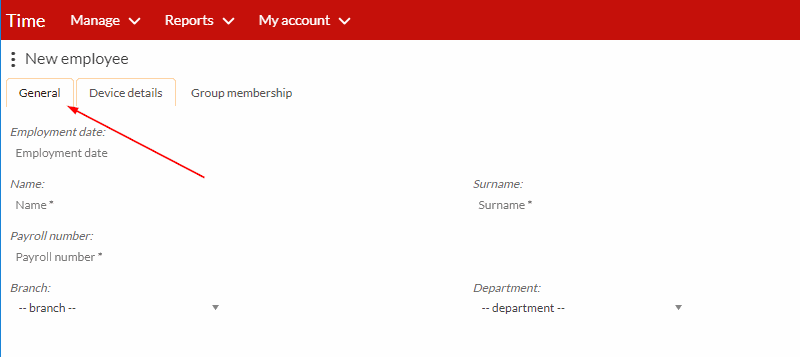
Step 3. Enter employee details under the "General tab", and please note if the tab appears orange that means there is action pending.
Employment date
Here you fill in the day that the employees started working.
Name and Surname
Here you fill in the full name and surname of the employee.
Payroll number
Here you fill in the payroll number (Employee number) but make sure it matches the on the Payroll system.
Branch
Here you fill in the name of the branch that the employee will be working from, if applicable.
Department
Here you fill in the name of the Department the the employees belongs to.
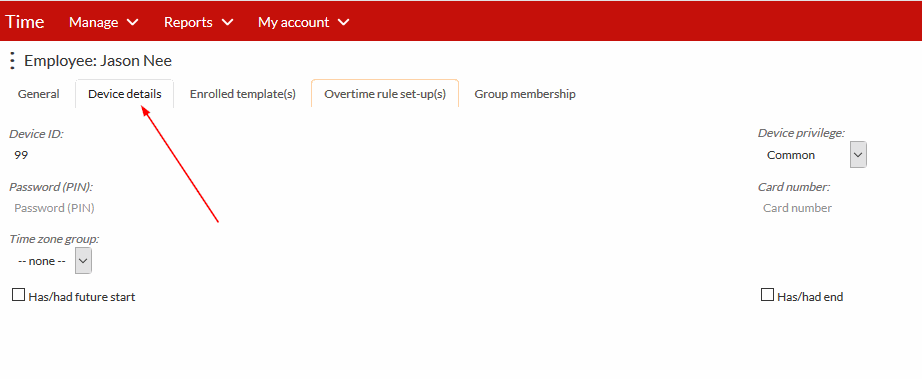
Step 4. Click on "Device details" to fill in the device details, and please note if the tab appears orange that means there is action pending.
Device ID
This only shows once you have saved the new employee information or when editing an existing employee.
Device privilege
Under device privilege you can choose if an employee should have administrator access to the device, or common user privilege. (Common users can only clock and not enter the menu options to change settings or enroll people.)
Password (PIN)
Here you can assign a Password to log into the device.
Card Number
Here you can assign an RFID card to the employee, if the company only uses cards or when the employee fingerprint can't be read by the device.
Time zone group
Here you can link your employee to the relevant Time zone group, this only applies in the access control setup, it restricts employees from clocking at times they are not suppose to.
Has/had future start
This is a feature for employees that are created before their start date, for example if an employee is being created today but only scheduled to start work in a months time then you select this feature and set the date.
Has/had end
Here you get to select the end date for an employee that has resigned, but has to work before his resignation date, for example when an employee gives a months notice.
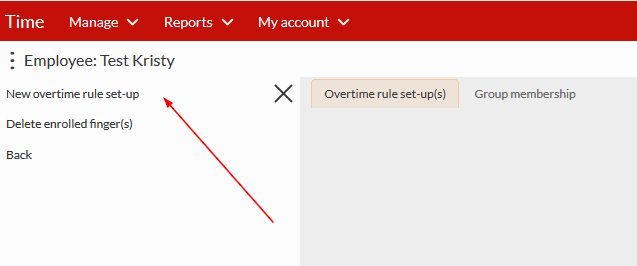
Step 5. The Overtime rule setup(s) tab showing as orange means, there is setup pending.

Step 6. To complete the pending setup you click on the three vertical ellipses on the top left corner, then you click on 'New overtime rule set-up' as indicated on the screenshot below.
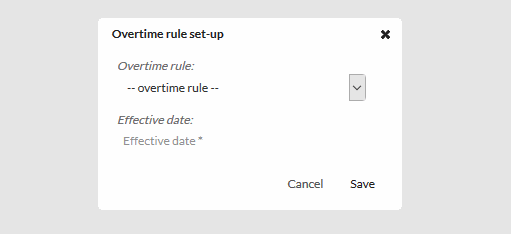
Step 7. A small window will appear in the middle of the screen, here you click on the drop down and select the overtime rule you wish to link the employee to, then you fill in the date on which you wish the rule to take effect, then click 'Save' once done.
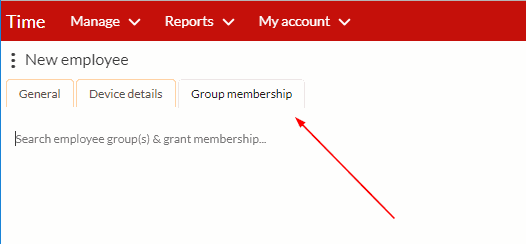
Step 8. Under Group membership you can link the employee to the relevant access group, this setup is only used in the access control setup, this allows them to access certain areas only.
There are no comments for now.
to be the first to leave a comment.