Setting up Mobile Attendance
Understanding mobile attendance
BC Time users have the ability to set up mobile devices that enable them to clock in and clock out employees without the need for an actual physical device being present. This functionality allows the user(s) to manage their employees' attendance without requiring the employees themselves to clock on an actual device, as long as the user has access to the branch and department to which the employees are linked. This functionality also introduces the use of geofence areas to ensure that employees clock in at their designated location and not from an unauthorised area.
The first step in setting up a mobile device involves the creation of the mobile attendance API, creating your mobile device, setting up your geofence areas, ensuring that the area is linked to a branch or location, and that the employees are correctly allocated to their designated branch, which will allow them to clock in and out from that location.
Creating your Device API
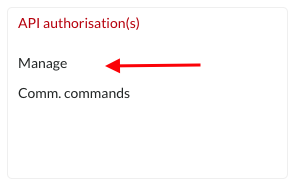
Step 1: Once you've logged into BC Time, navigate to Manage under API authorization(s) to create the Mobile attendance API.
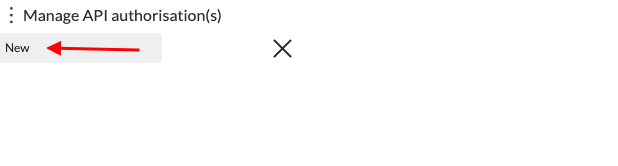
Step 2: Under Manage API authorization(s), select the meatballs (vertical dots) menu to create a New API.
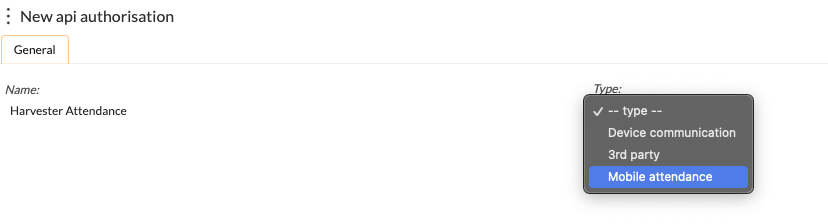
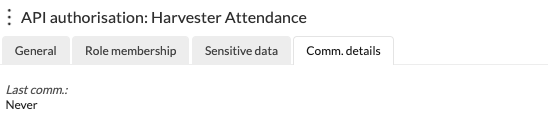
Step 3: The below window will appear — select Mobile attendance asType and give your API a name. Once the name and type has been set, BC Time will auto generate the role membership, sensitive data and communication details for this API.
Creating your Mobile Device(s)
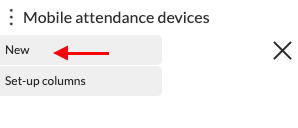
Step 4: Proceed to create your mobile device, by navigating to Mobile attendance under the Device(s) menu.

Step 5: Click the meatballs menu to create a New mobile device.
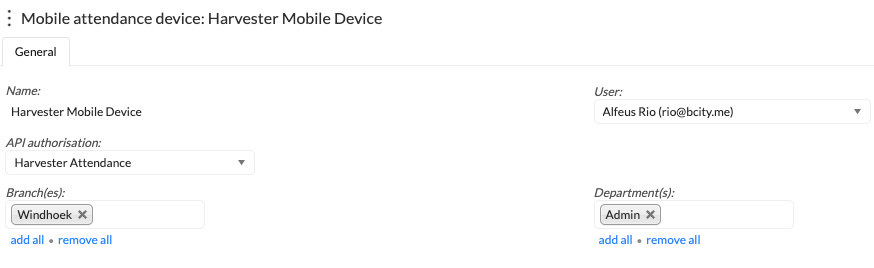
Step 6: The window below will appear, allowing the user to name their mobile device, link the user and the API initially created, as well as define the branch(es) and Department(s) the user should manage. NB — a user must have access rights to the profile in order to link them to a mobile device.
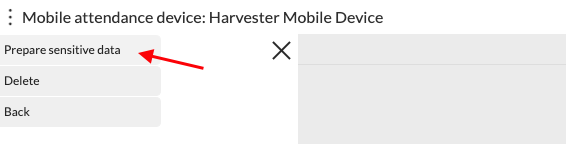
Step 7: Click the meatballs menu to access the "prepare sensitive data" option, which will prepare the data for the created device and trigger an email to the specified user to access the data on their respective device.
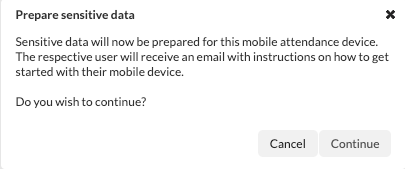
Once clicked, the window below will appear advising the user that the data is being prepared, and an email will be sent to the user with instructions on how to get started. Click continue to proceed with data preparation until success.
Step 8: Access your email on your preferred device to view the link received having successfully continued the data preparation process and click the 'let's get started' link as indicated in the image below.

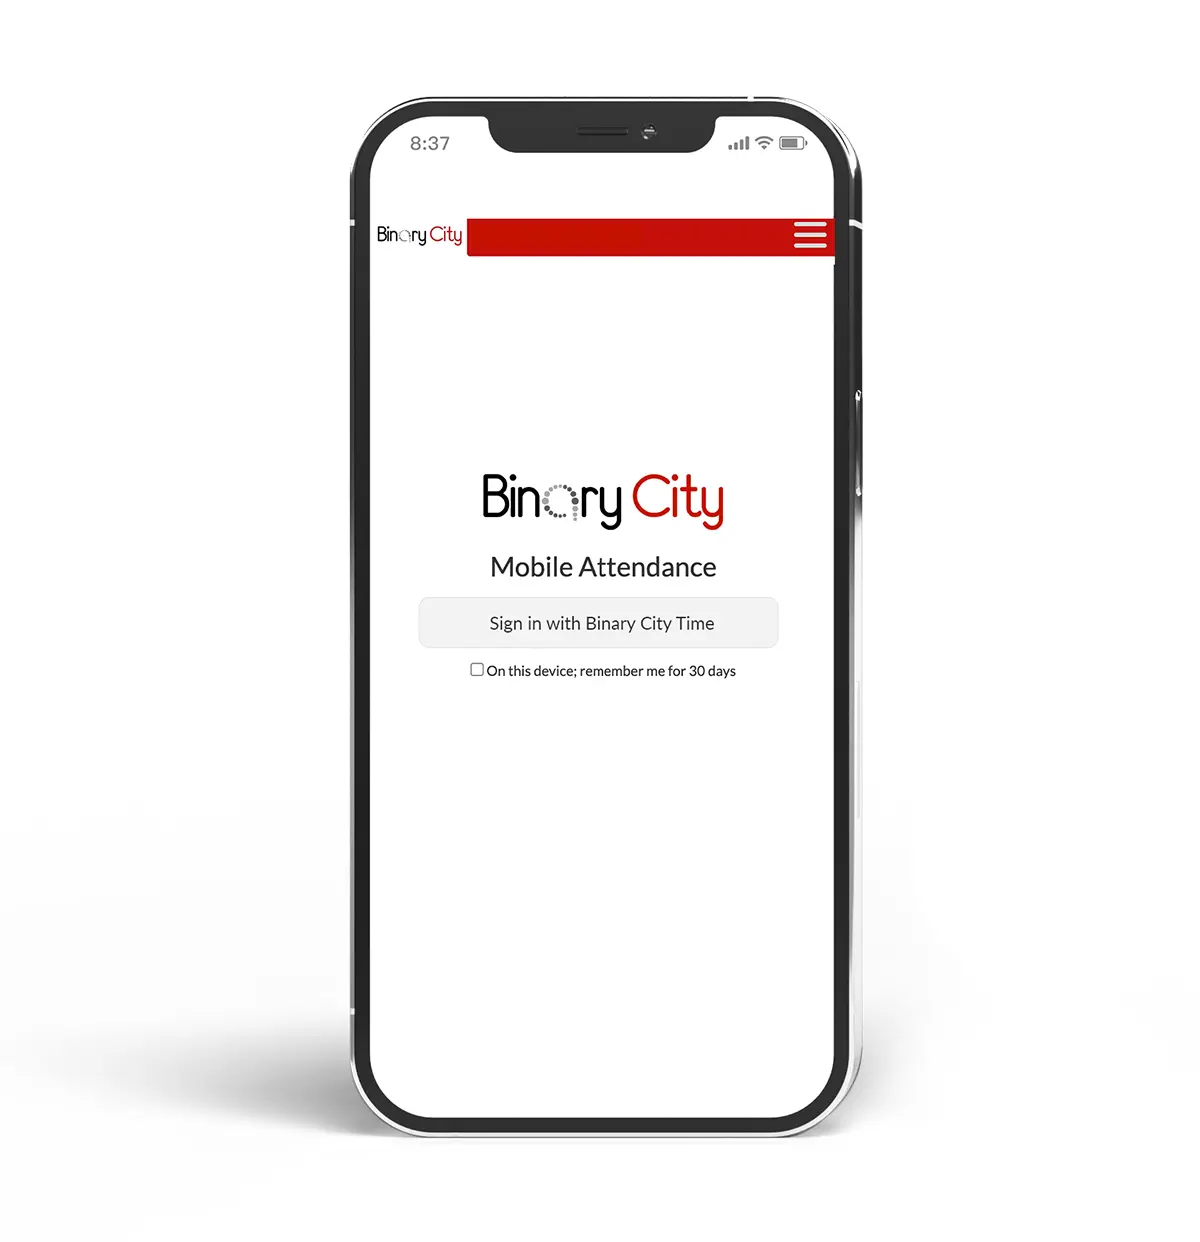
Step 9: Having clicked the link, the system will now direct you to a window via your browser to log into the application using your username and password (if you are not already logged in), to allow sign-in with Binary City Time. Should you prefer that the device doesn't ask you to log in with username and password every time you access the application, click the checkbox — On this device, remember me for 30 days.
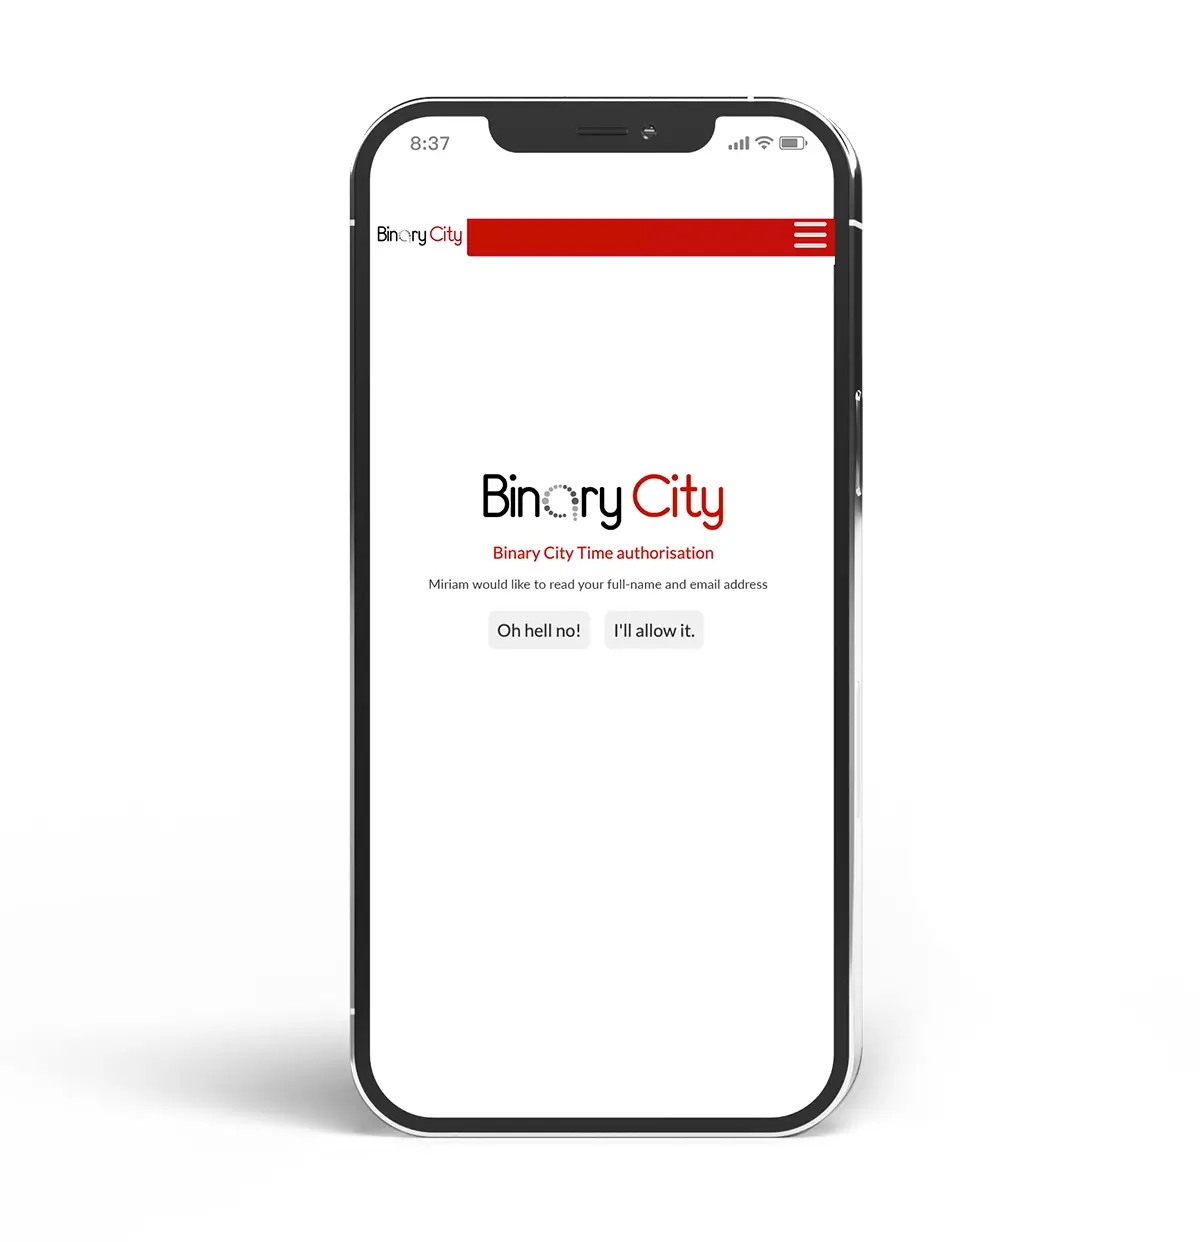
Step 10: Once signed in, the device will prompt the user to allow it in order to access the employee data. Click I'll allow it.
Once logged in successfully, you'll be presented with a view of the employees whose attendance the user has access to manage as displayed in the example below. The User will then select either the In or Out option on the employee whose attendance they wish to manage, in order to check them IN and the start of a shift, or check them OUT and the end of a shift.

Once a state has been selected, BC Time will seamlessly detect the state and report it on the employees attendance reports immediately.

Geofence area(s)
When clocking in employees, it is often necessary to ensure that they are clocked in at the area where they are intended to work and not from a different location. If an employee is meant to work at Farm Finkenstein, then they should only be able to clock in once they are in this designated location. This is why geofencing is important, making sure that your employees are linked to the right geofence area.
Setting up a geofence area
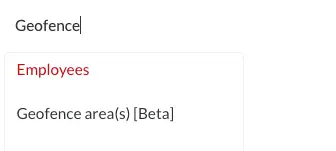
Step 1: Under the employees tab in BC Time, navigate to Geofence area(s) or use the search option to access the Geofence area(s) menu.
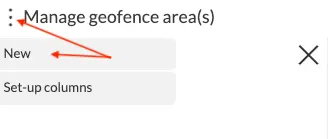
Step 2: Once in the Geofence menu, the user will be able to create a new geofence area by clicking the meatballs menu.
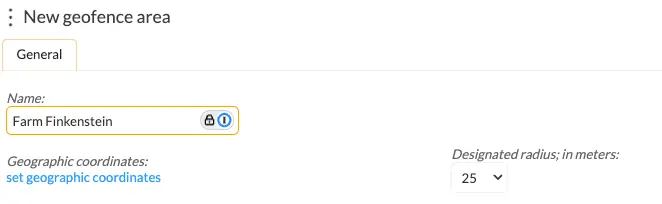
Step 3: Give your area a name. In our example below, the area is named "Farm Finkenstein". Then set your area's geographic coordinates by clicking on "set geographic coordinates".
Step 4: If location access is already enabled for your device, the user will be presented with a map view on which to search and set their geofence area. In our example below, the area being set is Farm Finkenstein in Windhoek, Namibia, as the location where our Harvesters will be allowed to check in and check out.
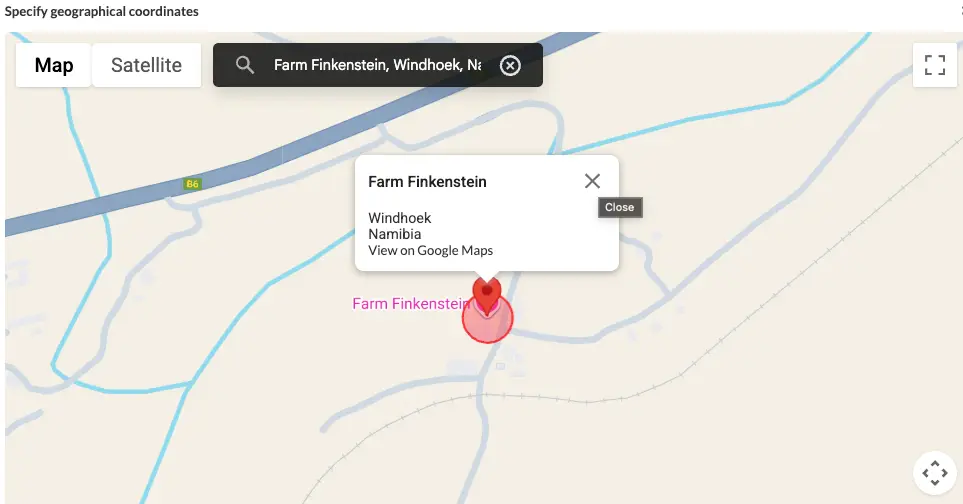
Step 5: Once the user has defined their area by clicking the location pin, the below prompt at the bottom of the screen will be displayed to allow the user to update the set area.

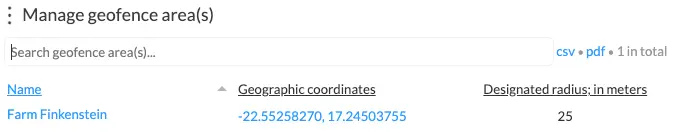
The area once set will then have been created as per the image below.
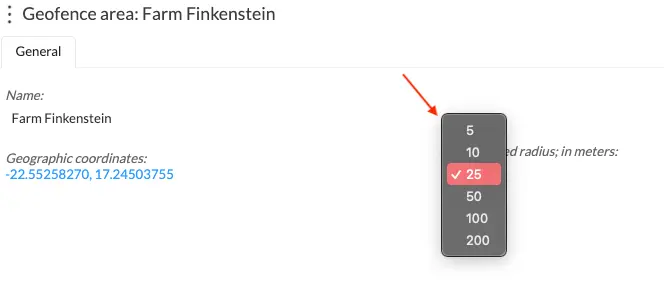
Clicking on the name of the area will present the user with the option to define the clocking radius for this location in meters
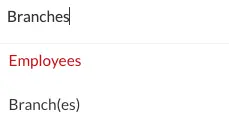
Step 6: Now that the geofence area has been created, it needs to be linked to a branch or location. Under the Employee(s) menu in BC Time, select Branch(es).
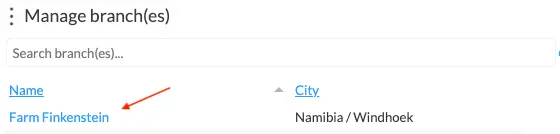
Step 7: Select the branch in the branch menu to which you would like to link your crerated geofence area.
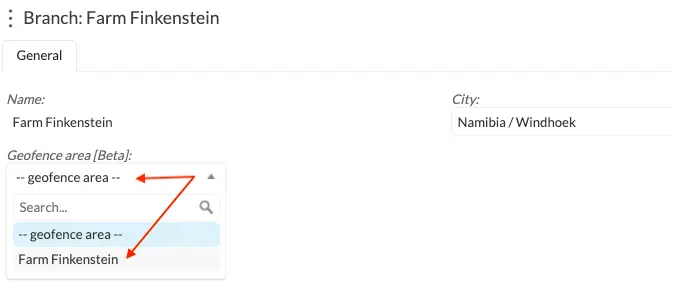
Step 8: Click the Geofence area tab and set the geofence area for the selected branch.
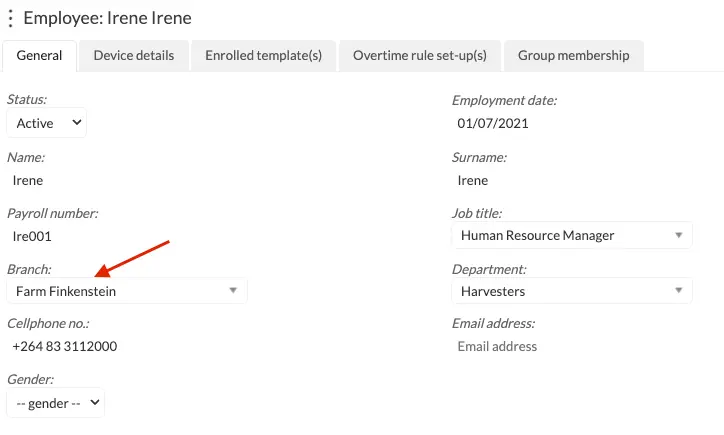
Step 9: Now that the area has been set, the user must ensure that the employees required to clock in at the designated location are correctly linked to this branch, as per the image below indicating that employee "Irene" has been linked to branch Farm Finkenstein which is linked to the geofence area initially created.
Nenhum comentário até agora.
para ser o primeiro a deixar um comentário.