Pastel Payroll - Batch configuration
How to configure your Pastel Payroll batch layout
Prerequisite:
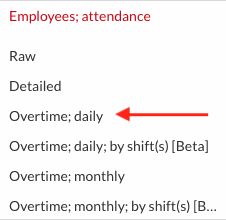
Once logged into the system, go to Reports | Overtime; daily
(Please note, you must have access to this in the system with the user that you are logged in with, if not - please ask your administrator to assist)
Draw the report without summarising the data, and ensure that all the columns that you wish to include in your payroll export, is shown.
If you need to make changes to the columns (add new ones, take columns away, etc.) simply double click on the headings and you’ll be able to switch on or off the columns that you need or do not need.
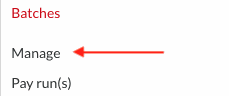
Step 1: Click on Batches | Manage
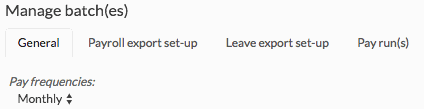
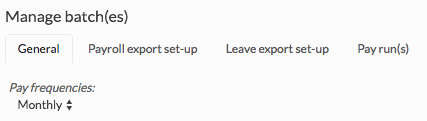
Step 2: Configure the batch frequency
Under the “General” tab, indicate the pay frequency - this is most often “Monthly”.
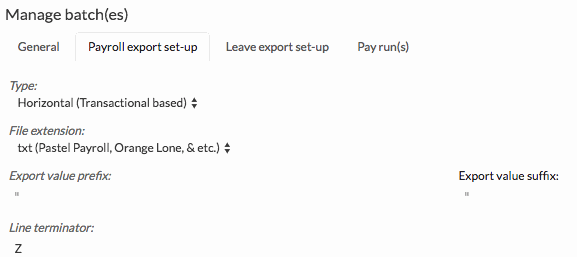
Step 3: Configure the batch layout
Move to the “Payroll export set-up” tab and configure the settings as per screenshot below:
Under the columns, you should please add 8 columns (This has to be exact) and set up the columns as follows:
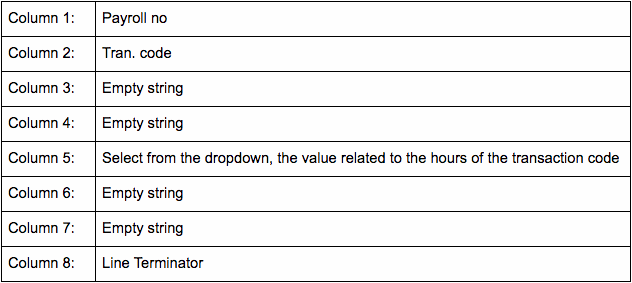
You can add as many rows as needed for the various transaction codes needed. An example is shown below:

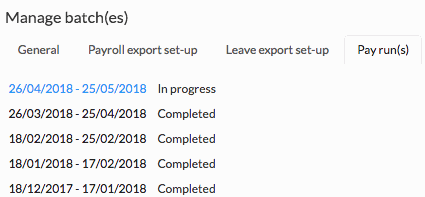
Step 4: Configuring your batch periods
Move to the “Pay run(s)” tab and configure your pay run periods. The system will automatically keep creating these periods based on the pattern that is created here. A typical setup is shown as an example below.
Step 5: Exporting your hours
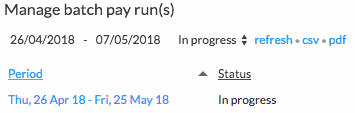
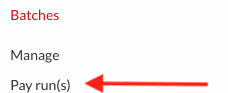
So at the end the month, when you’re ready to export your hours, simply go to Batches | Pay run(s):

Select the period that you wish to export:
And simply click the “Export” button which will download the file that you should import into Pastel Payroll as a batch transaction.
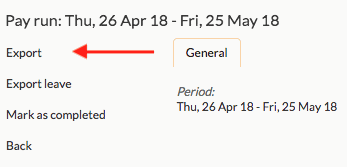
Once you are satisfied for the payrolls’ period processing, please return here and mark this period as “completed” to lock the hours in this period in the system. No further changes will be able to be made to the hours of batches that are completed.
Leave Export
Step 1: Configure the batch frequency
Under the “General” tab, indicate the pay frequency - this is most often “Monthly”.
Step 2: Configure the Leave batch layout
Move to the “Leave export set-up” tab and configure the settings as per screenshot below:
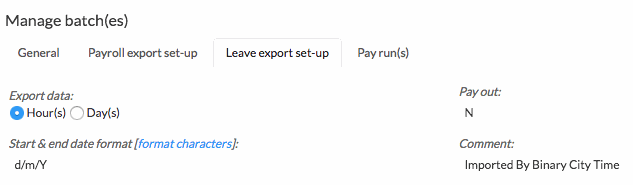
**Use the “format characters” option to select the exact date format needed by your payroll system
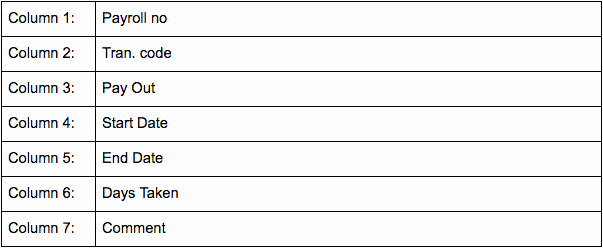
Prerequisite: Under the columns, you should please add 7 columns (This has to be exact) and set up the columns as follows:
In the first value, enter the transaction code to be used in Pastel Payroll
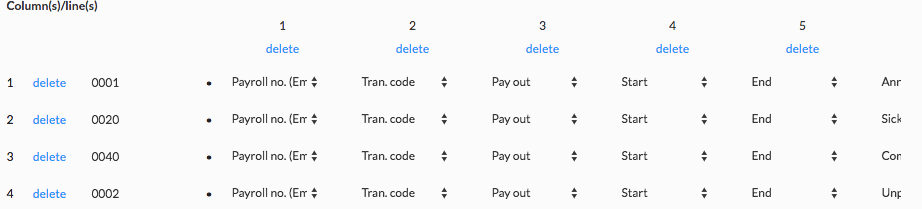
You can add as many rows as needed for the various transaction codes needed. An example is shown below:
Step 3: Exporting your leave
So at the end of the month, when you’re ready to export your leave, simply go to Batches | Pay run(s):
Select the period that you wish to export:

And simply click the “Export Leave” button which will download the file that you should import into Pastel Payroll as a batch transaction.

Once you are satisfied with the payrolls’ period processing, please return here and mark this period as “completed” to lock the hours in this period in the system. No further changes will be possible to the hours of batches that are completed.
Nenhum comentário até agora.
para ser o primeiro a deixar um comentário.