How to setup Plans and Billing in BC Time
Setting up Plans and Billing in BC Time
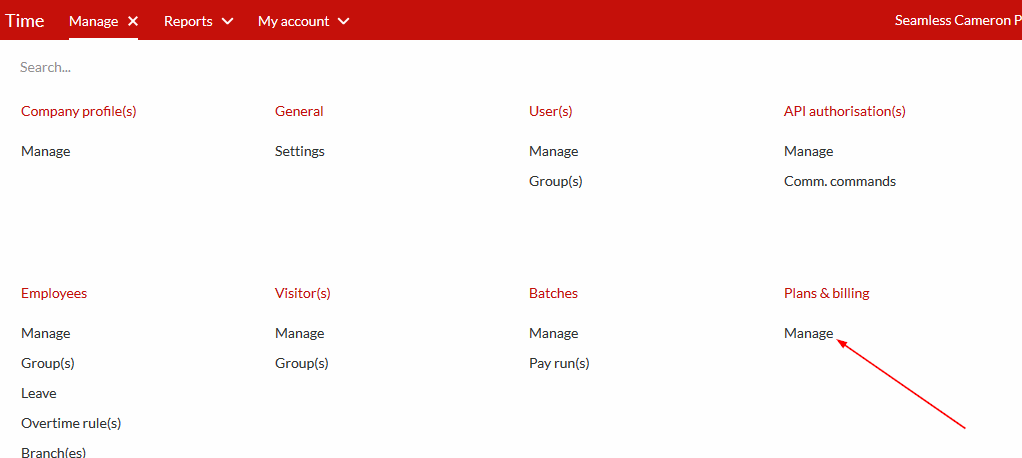
Step 1: Once you logged in to BC Time, click on Manage | Plans and billing | Manage
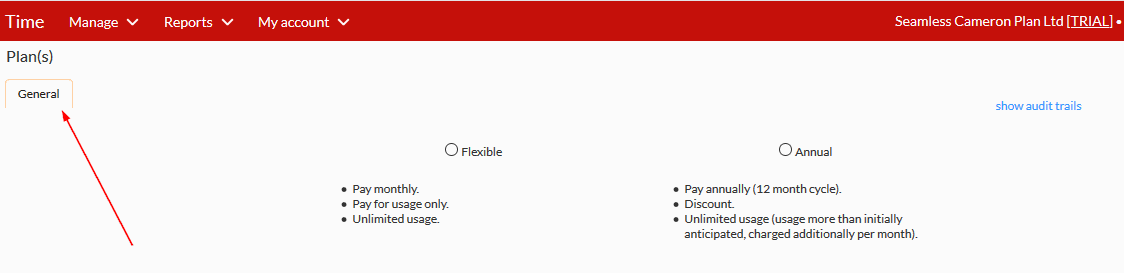
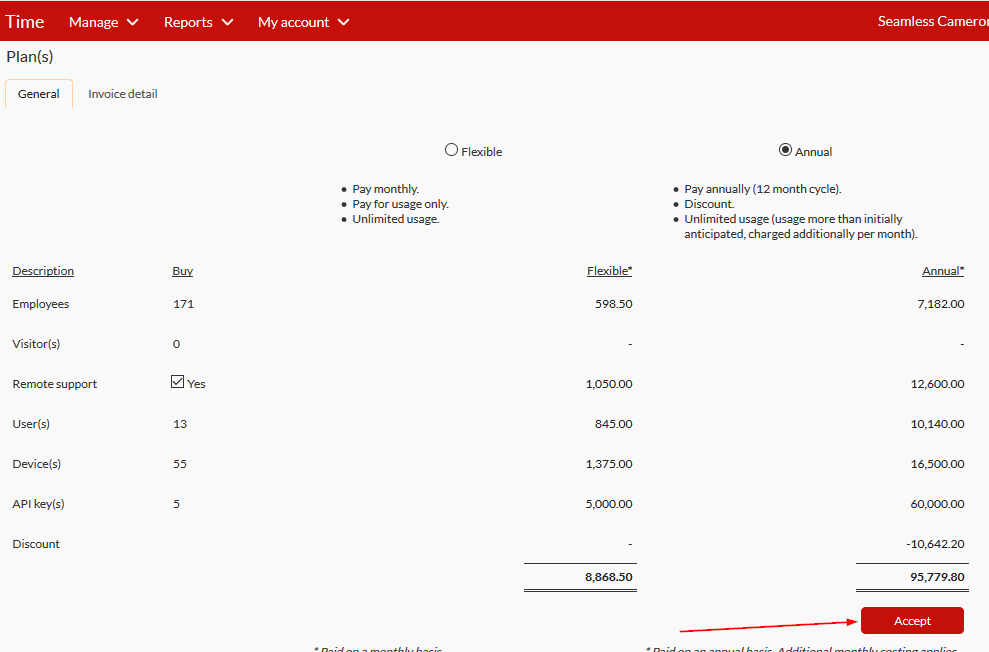
Step 2: Under General, you have two subscription options to choose from, you can either go with the Flexible option which is a monthly subscription or you can go annual which is the yearly subscription. In the example below we chosen Annual, see screenshots below for visuals.
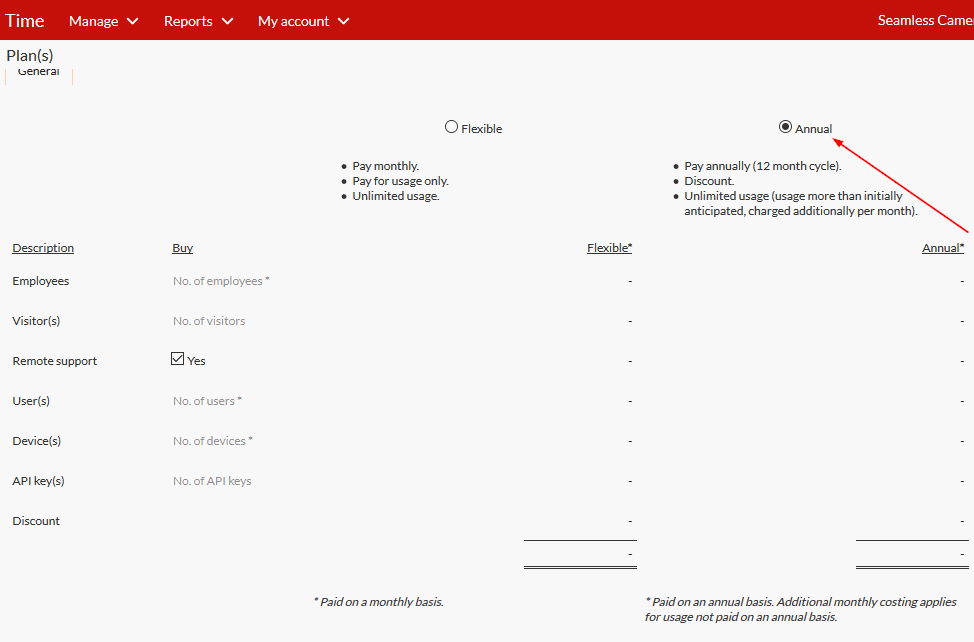
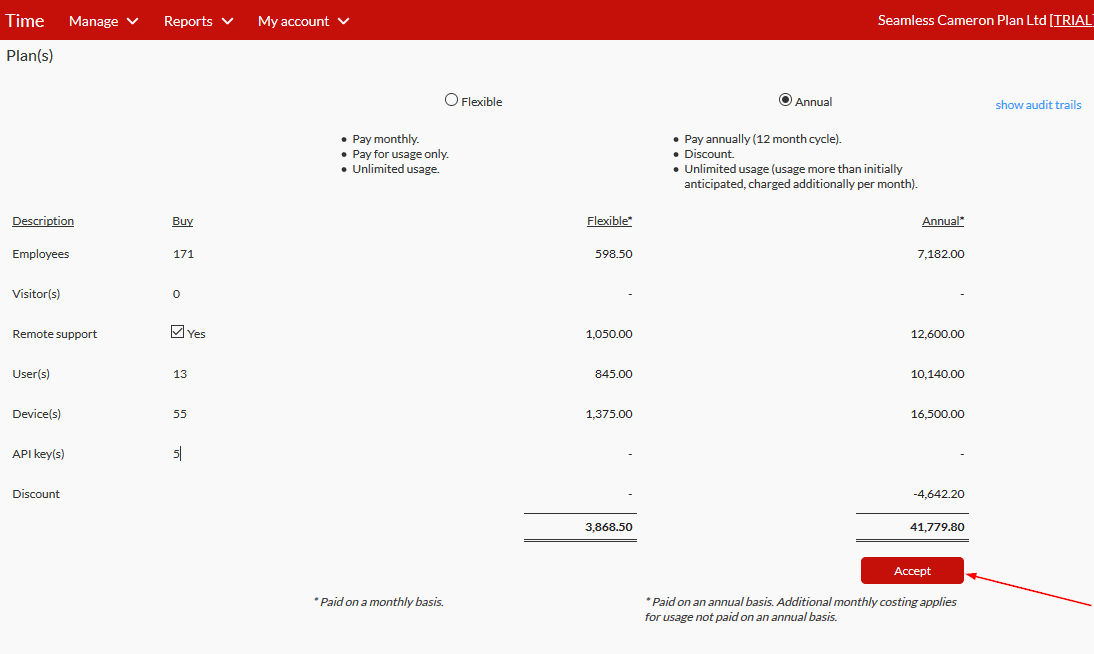
Step 3: After you have chosen your preferred subscription, you will be expected to complete the fields on the right side of the page, number of employees, number of visitors for access control purposes only, for Remote support, tick the box if you would like to have it included in your subscription and if you would like to pay ad-hoc for remote support please untick the box, number of Users, number of devices and number of APIs. Once all that is completed, click accept.
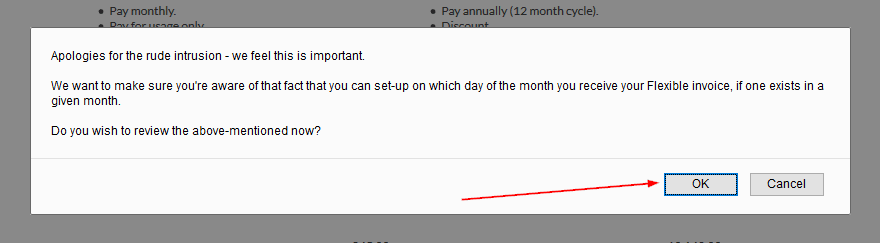
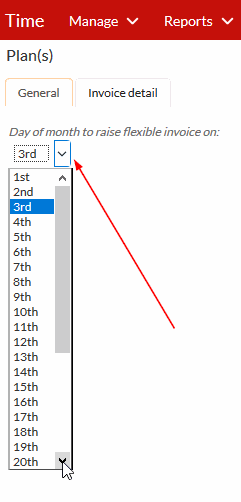
Step 4: The alert is to request that you choose a date on which you wish your flexible invoices to be raised. If you are on annual and in any given month you increase your initial purchased number of employees, users or visitors then an invoices will be raised for that month. Press 'OK' to select your preferred date or Cancel to proceed.
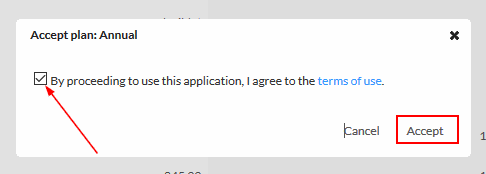
Step 5: Once done the application will require you to continue to accept the calculations. Click the accept button as shown on the screenshot below.
Step 6: Continue to check the check box and click on accept up as shown below.
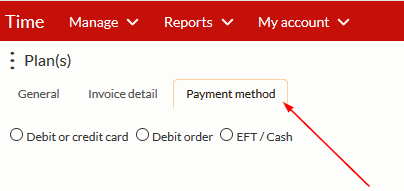
Step 7: Under payment method, you're required to choose which method you wish to go with. Please note, the EFT option will not show under payment method, it has to be requested for from our sales team.
Nenhum comentário até agora.
para ser o primeiro a deixar um comentário.